Introduction
Although a bicycle has been invented in the Steam Age, its time came in the age of rockets and computers. Into the third millennium it enters with the perspective to become one of the devices, which represents its better human self in relationship to the environment and can contribute to improve mutual relationships among people. A more significant role should now play the school in the process of “community colization”. This text is determined to those who feel the need to influence and play the role of a cycling parent, teacher or trainer of children, young people, and adults.
Bicycle anatomy
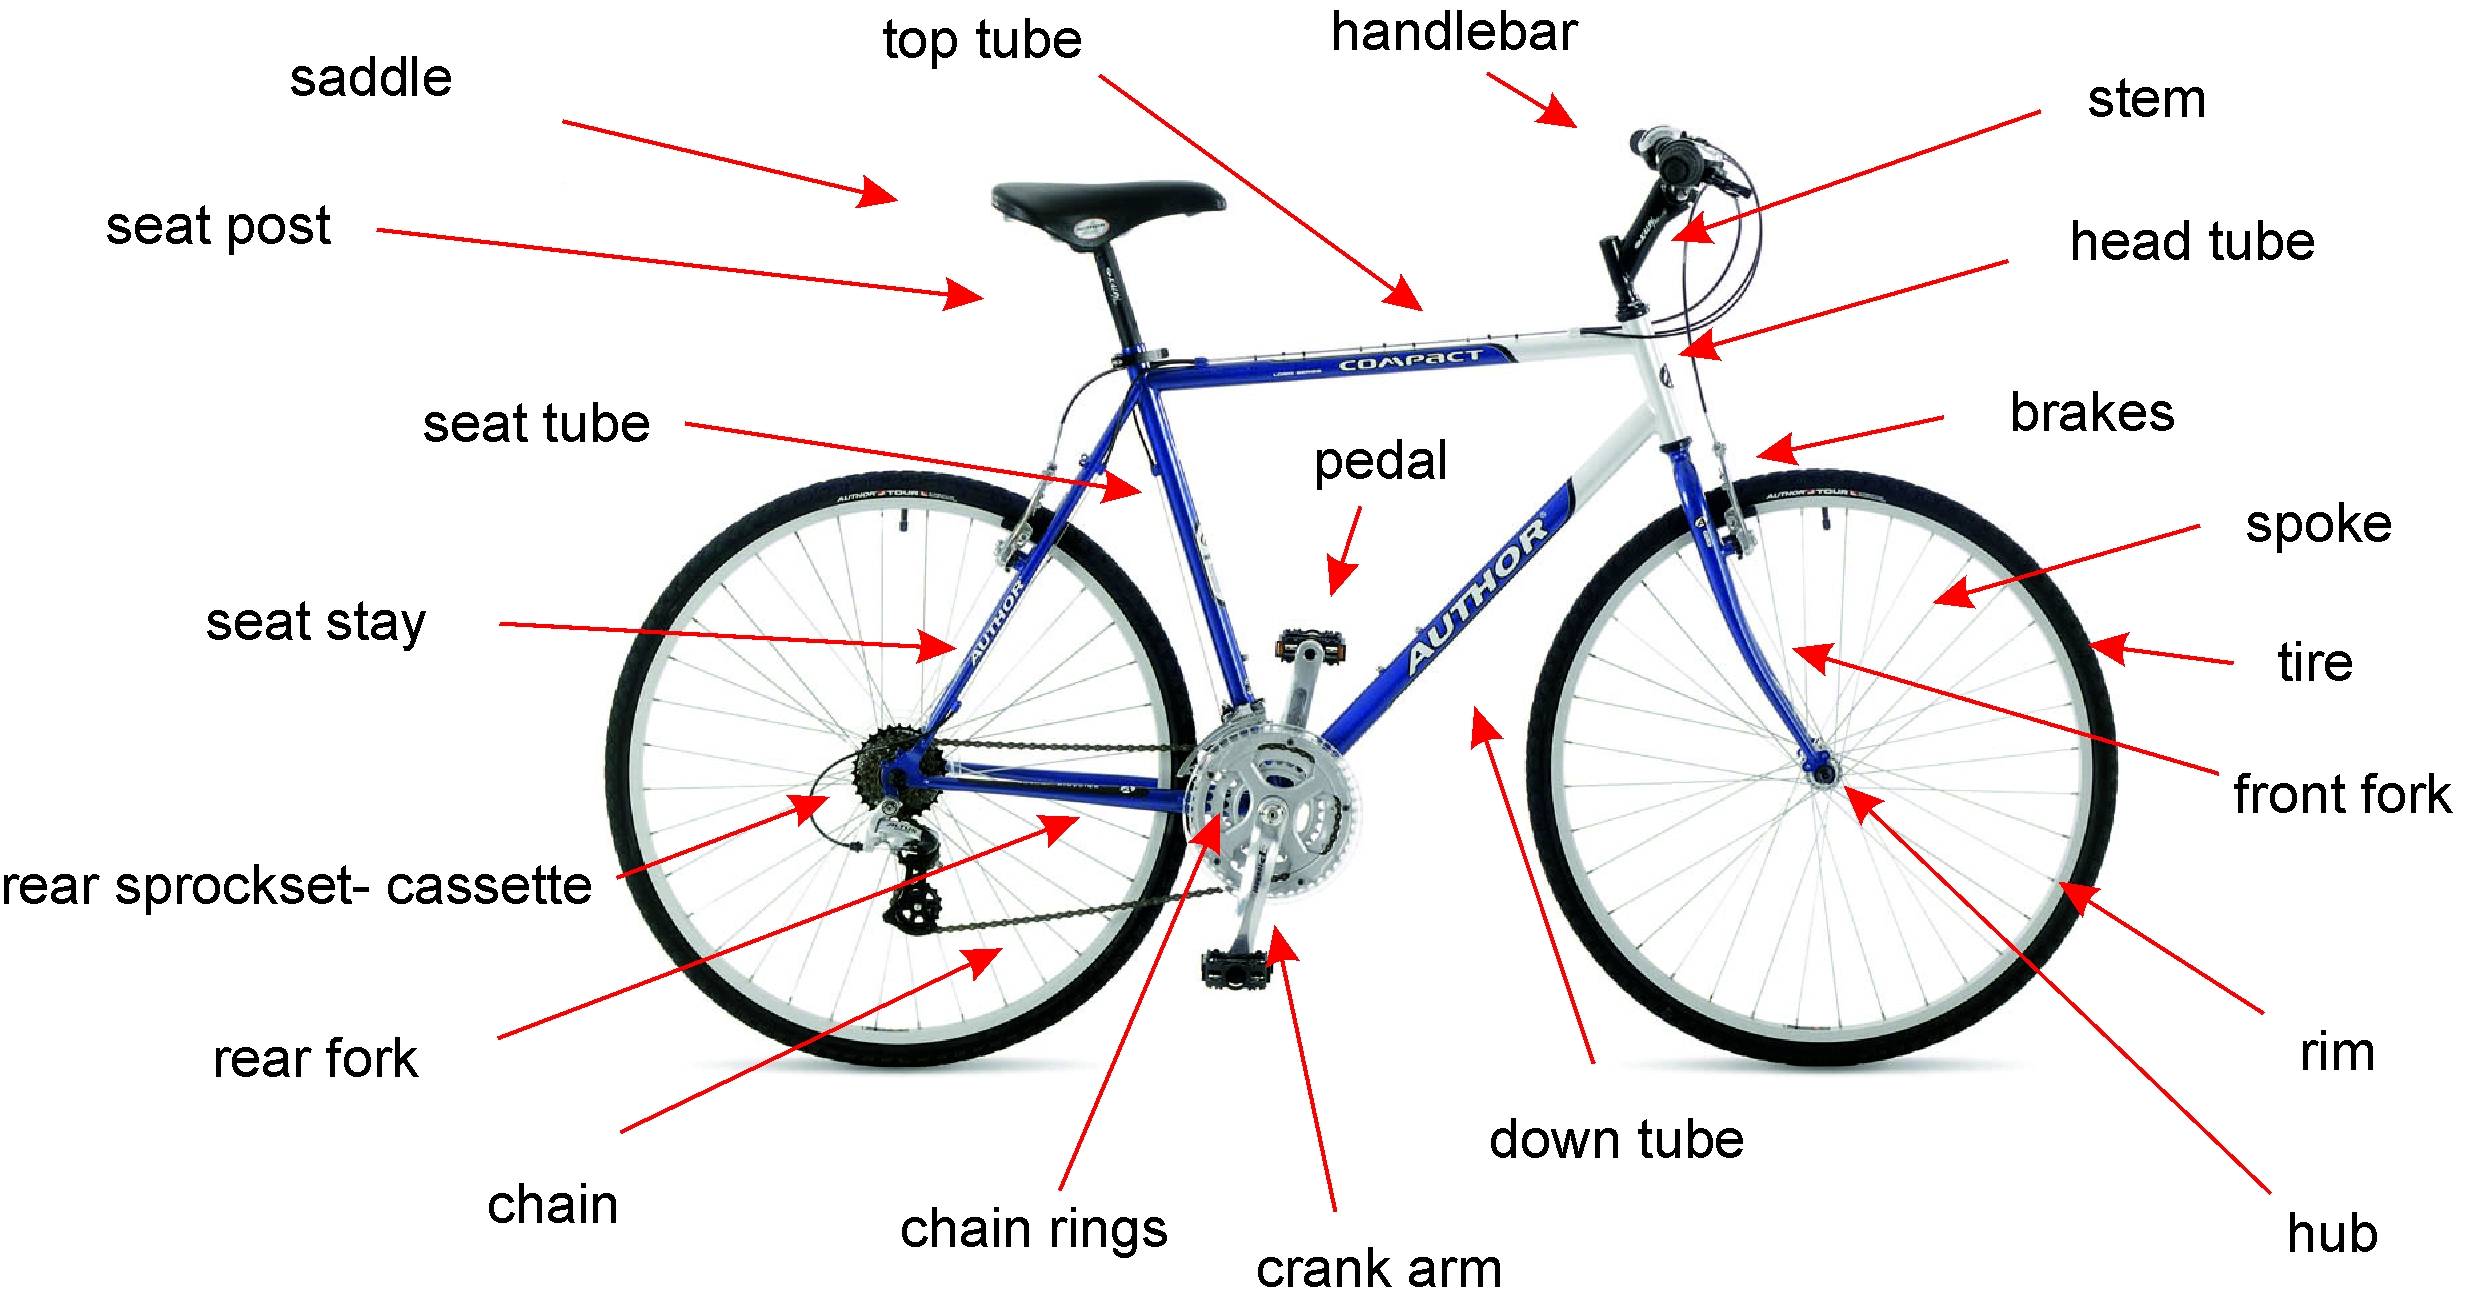
The cyclist´s language is in comparison to the others quite easy. In the picture you can see several basic terms, which every cyclist should know.
Checking the bicycle
Checking the bicycle before riding
-
Check the pumped type by pressing it by a thumb. Although the front wheel can be pumped less than the back one, you should not press it down too deep, but only a little on the surface. When knocking the tyre it makes a higher bell tone. The less pumped tyre better damps down crashes and is more adhesive to terrain and the slippery ground, but you can make it easily flat by a hard object.
-
Check the brake function by pulling the brake bars and by moving the wheel forward at the same time. The brake has to start working in time, the brake bar must not get up to the handle bars and brake blocks have to fit exactly to the wheel rim.
-
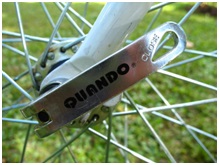
Check the wheel fixed in the cycle fork – check the fixing nuts or the fast gripping mechanism. Do not bend its bar against the cycle fork and do not use the maximal strength, so you could open the mechanism in case of need.
Monthly checking and checking before a longer ride
Framecycle fork, stem and handle bars. Concentrate on pipe connections and endings. The damaged paint and change of colour can be a sign of changing its solidity. Cracks or bends are obviously bad.
Bearings and its working, including pedals. Check it by sensitive forcing the wheel rim, pedal handles and the pedal body. The will of the bearings in handle bars can be find out during riding and confirmed by braking, pressing the front brake and moving the front wheel forward and backwards.
TyresCheck the state of pattern even on sides.
Wheel rimsCheck the state of centring, marks after crashes and wheel rims cleanness, where the brake blocks touch the wheel rim. Check the state of wheel rims in the place of braking. Their thinning on sides can lead to braking during riding
SaddlePush the saddle to sides strongly to check whether it does not need tying in the saddle lock. The saddle pole must not be upper than the safety line.
Stem and handle bars. Check fixing in a way that you hold the front wheel between legs and twist handle bars. Do not use the maximal strength. If you manage to turn handle bars outside the bike axis, you must lose the stem nut at first (about 7 turns) and knock it from the top. When the stem turns loosely, turn the handle bars into the right direction and then tie the nut again. It is not right to turn handle bars only by strong turning. Check tying the nuts which hold the stem.
Brakes. Kontrolujeme dotažení upevňovacích šroubů brzdových pák na řídítkách, brzdových čelistí a lanka. K seřízení chodu brzdy používáme seřizovací šroub na lanku brzdy nebo posunutí brzdových špalíků. Pokud je brzdový špalík opotřebený tak, že jeho kovový nosník (botka) doléhá při brzdění na ráfek, je třeba jej okamžitě vyměnit. Pokud tuto blížící se závadu nezjistíme při kontrole, tak nás o ní zcela jistě uvědomí ostrý kovový zvuk při brzdění a hluboká rýha v ráfku kola. Brzdnou plochu brzdových špalíků očistíme od drobných kamínků, které působí na ráfku jako brusný papír a přesně seřídíme jejich dosednutí na ráfek.Check tying the holding nuts of braking bars at handle bars and wires. Brakes are put in working order by a nut placed on the brake wire or by moving the brakes blocks. If the brake block is worn out that the iron shoe touches the wheel rim when braking, it is necessary to change it immediately. If you do not find this problem when checking the bike, you will definitely realize it when you hear a sharp steel sound when braking and find a deep scratch in the wheel rim. Clean the braking area of brake blocks, put away little stones, which damage the wheel rim and set their matching the wheel rim.
Gears and chain. Tie the nuts, which fix gears on the right wheel handle. Check the state of chain and gear teeth and pinions as well. The chain must be flexible everywhere in a same way and oiled adequately. If we move with pedal handles backwards, we can find the inflexible chain part when going through the pinion and the gears shoulder. The inflexible chain part moves especially bad on small wheels of the derailleur pulley. The reason is mud or rust, sometimes also a bad chain connection. The chain has to be cleaned, moved to sides by slight forcing and oiled.The state of chain can be checked by a calibre or a simple trial. The calibre can distinguish quarts of the chain life. If you do not have a calibre, you can improvise. Put the chain on the biggest gear and then you hold it between fingers in the front part of the gears and lift up the teeth. If you can lift the chain up to the top of the gear tooth, its life is over. It is necessary to replace it. If the chain can be lifted above the height of the gear tooth, the chain destroys teeth on gears and pinions. The new chain then slips and jumps on such teeth. In this case you have to change the worn pinions and gears. If the chain is alright, oil its inner space, places between the friction areas and wipe the oil on the surface. If you change the chain, the new one should have the same number of parts as the old one.Stav řetězu zjistíme pomocí kalibru nebo jednoduchou zkouškou. Kalibr dokáže přesně rozlišit čtvrtiny životnosti řetězu. Pokud nemáme kalibr, můžeme provést zkoušku opotřebení řetězu improvizovaně. Dáme řetěz na největší převodník a potom jej vpředu na převodníku uchopíme mezi prsty a zvedneme z jeho zubů. Pokud lze řetěz zvednout téměř do výšky špičky zubu převodníku, je zcela jistě jeho životnost vyčerpána. Je třeba jej vyměnit. Pokud jde řetěz zvednout do výšky nebo přes výšku zubu převodníku, tak jeho opotřebení znehodnocuje zuby na převodnících a pastorcích. Na takových zubech nový řetěz klouže a přeskakuje. Nyní již nezbývá než vyměnit i opotřebované pastorky a převodníky. Je-li řetěz ještě v pořádku, namažeme jeho vnitřní prostor, což jsou místa mezi třecími plochami článků a všechen olej na povrchu dokonale otřeme. Při výměně řetězu dbáme na to, aby nový řetěz měl stejný počet článků, jako starý.
Pedals. Check whether pedal handles are tied, the state of body and fixing mechanisms of a shoe on the pedal, including the release strength of clip pedals. When changing pedals be careful not to exchange them, because the left pedal has the opposite turns. Pedals are marked in the language of the country of origin, mostly in English R – right and L – left.
Be careful when fixing the pedal to the handle. Pedals should be fixed easily, do not use strength.
Cleaning and oiling the bicycle
Mud and dirtiness is not aesthetic, but is also destructive for bike parts. If the bicycle is slightly mudded, it is enough to wipe it by a piece of cloth. If it is mudded a lot, wash it at first by water. If you use a strong stream of water, do not direct it to bearings. Then wash grease by water with the washing-up liquid, you can use different types of brushes (also the toothbrush) and sponges. A special attention has to be devoted to brake areas on wheel rims, gears, pinions and chain (special washing up devices for chains are sold). The chain has to be oiled by a WD – 40 oil or other bike oils. Wipe the chain then by a piece of cloth and be careful other parts of the bicycle were not covered by oil.
The most common repairs on trips
Tyre puncture
Open the brake bars and put the chain to the smallest pinion and take the wheel off the frame.
Let the rest air go away and if necessary screw out the safety nut of the inflation valve.
Push the inflation valve or its body gently into the wheel rim.
Press tyre sides together on the whole perimeter, so they got away from the wheel rim. A mountain bike tyre (especially the often used one) can be put down with hands. Pull the one tyre side over the wheel rim and carry on with pulling the whole tyre. Otherwise you must usually use assembly handles. The first one is placed between the wheel rim and the tyre side on the other side than the inflation valve is and pull the tyre side over the wheel rim. Work carefully so you would not squeeze the tube to the wheel rim or the tyre by the assembly handles, because you could make a hole in the tube. Work with the other assembly handle about 10-15 cm aside. Then move with one assembly handle around the whole wheel and pull the tyre side over the wheel rim.
Push the inflation valve through the hole in the rim and pull the tube out.
Pump the tube and put it close to your ear and chin. Most holes can be heard during this control and felt on your chin. If you cannot find the hole, you have to use the container with water. Even a small hole can be revealed by small bubbles going from the tube up.
When sticking, the areas which will be stuck together should be clean and then follow instructions written on the glue. Do not use the old glues because they had a different chemical mixture. Before fixing the tube in the tyre, check the patch.
Check whether the puncture was not done by a wire pushed through the wheel rim or by a sharp object stuck in the tyre; the puncture could be repeated. When checking the tyre, check whether there is no hole. A smaller hole can by wedged by a piece of rubber from an old tyre, which you can carry in your repair kit. If there is no other possibility, a bigger hole in the tyre can be sewed. A big puncture on a tube cannot by repaired by a patch. You can solve it by spraying a foam into the tube through the inflation valve or tying a knot on the tube.
Pull the inflation valve of the little pumped tube through the wheel rim and put the rest of the tube into the tyre.
Push the inflation valve with its body partly into the tyre and set the tyre around the inflation valve at first. Then gradually pull the rest of the tyre over the wheel rim. The last is pulled the part opposite the inflation valve. Especially when pulling the thin road tyres over, you have to use power and sometimes assembly handles to put the tyre on the wheel rim.
Check whether the tube is not squeezed between the tyre side and the wheel rim and fits well around the whole wheel rim perimeter.
Pump the tube to the required value.
When repairing tubes in terrain, be careful little stones did not stuck on the tube, because they could make another puncture later.
Broken wire in the wheel
Bend the broken wire at the wheel hub in the half and turn it out of the nipple screw – nuts holding the wire in the wheel rim. If we cannot hold the nipple between fingers, use the centring key to hold it. You usually do not have a new wire on a trip, but you should not leave the wheel de-centred, even though it touches the brake blocks only slightly. Lose the nipple of the neighbouring wires to the broken wire, so the deviation was smaller. When you get home, replace the missing wire and centre the wheel.
If the wire breaks at the nipple and behind the gears and it is not possible to take out (you do not have any tool to cut it), plait it carefully into the other wires so it did not get stuck in gears or the cycle fork.
Cut chain
If you have a riveting device, you can easily connect the chain. If some chain parts are broken or a rivet is missing, we have to shorten the chain. If you do not have a riveting device, you have to use a crew, nail or wire of the same size to connect the chain. The rivet should exceed the chain 1-2 mm on each side and knock it by a hard object against the solid support. In the end check whether the chain goes through the gears and pinions. If not you have to knock the rivet more.
| Checking the pumped tyre |
| Checking the brake function |
 |
| Fixing the wheel in the front cycle fork with a rightly fixed handle |
| Checking wheels fixed in cycle forks and tightening the fast fixing mechanism |
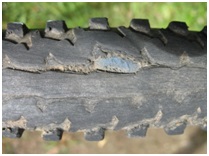 |
| A rubbed through tyre |
| The saddle pipe has to be in up to the safety line minimally |
| Checking the handlebars – fixing the stem on the front cycle fork |
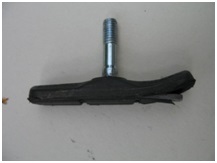 |
| A worn brake block |
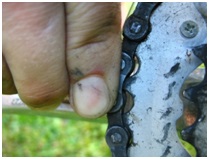 |
| Testing the chain state – worn out |
| Checking the chain and its change |
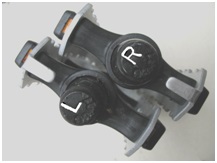 |
| The right and left pedal |
| A simple caring for the chain after cycling in rain and mud |
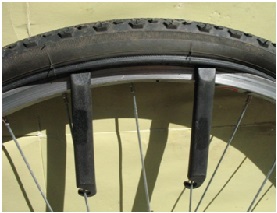 |
| Assembly handles placement when taking the tyre off |
| Repairing the tyre puncture – taking off and putting on the wheel, gluing the tube, checking the wheel rim and the tyre |
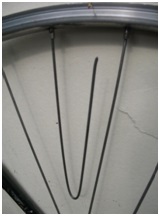 |
| Taking off a broken wire and centring the wheel |
 |
| Adjusting the right saddle height in relation to the length |
