Cycling technique of an individual
The right technique of riding helps to cope purposefully with physical laws (resistance, friction, gravitation) during an economic and safe ride.
Sit
The sit is determined by the cyclist´s position on the saddle, handlebars and pedals. The upper saddle level should be horizontal with the ground. Hands should hold handlebars in the width of shoulders. There are exceptions according to the cycle type and sit, it should always meet the cyclist´s requirements and trunk and back should be lose and arms slightly bended. The height of saddle and handlebars for the recreational sit should not differ from each other more than 10 cm. The right sit is basically influenced by the bicycle choice and mainly by the frame height and length. Some deficits can be solved by moving the saddle and choosing the stem and handlebars. The basic test of the right setting the saddle height is realized in a way that the cyclist sits on the bike, holds something by hand and puts heels on pedals. The saddle is in the right height when the leg is freely stretched. If the cyclist have to move in hips to sides (from the back view he/she does a movement in lumbar spine to sides), so he/she got to the furthest point of cycling, the saddle is too high.
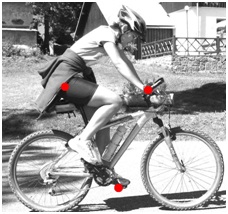
For the right sit it is necessary to move the saddle in the front-back direction. In the right position is the front part of your knee above the pedal axis, which is in front when cycling. Move the saddle slightly backwards for an endurance ride.
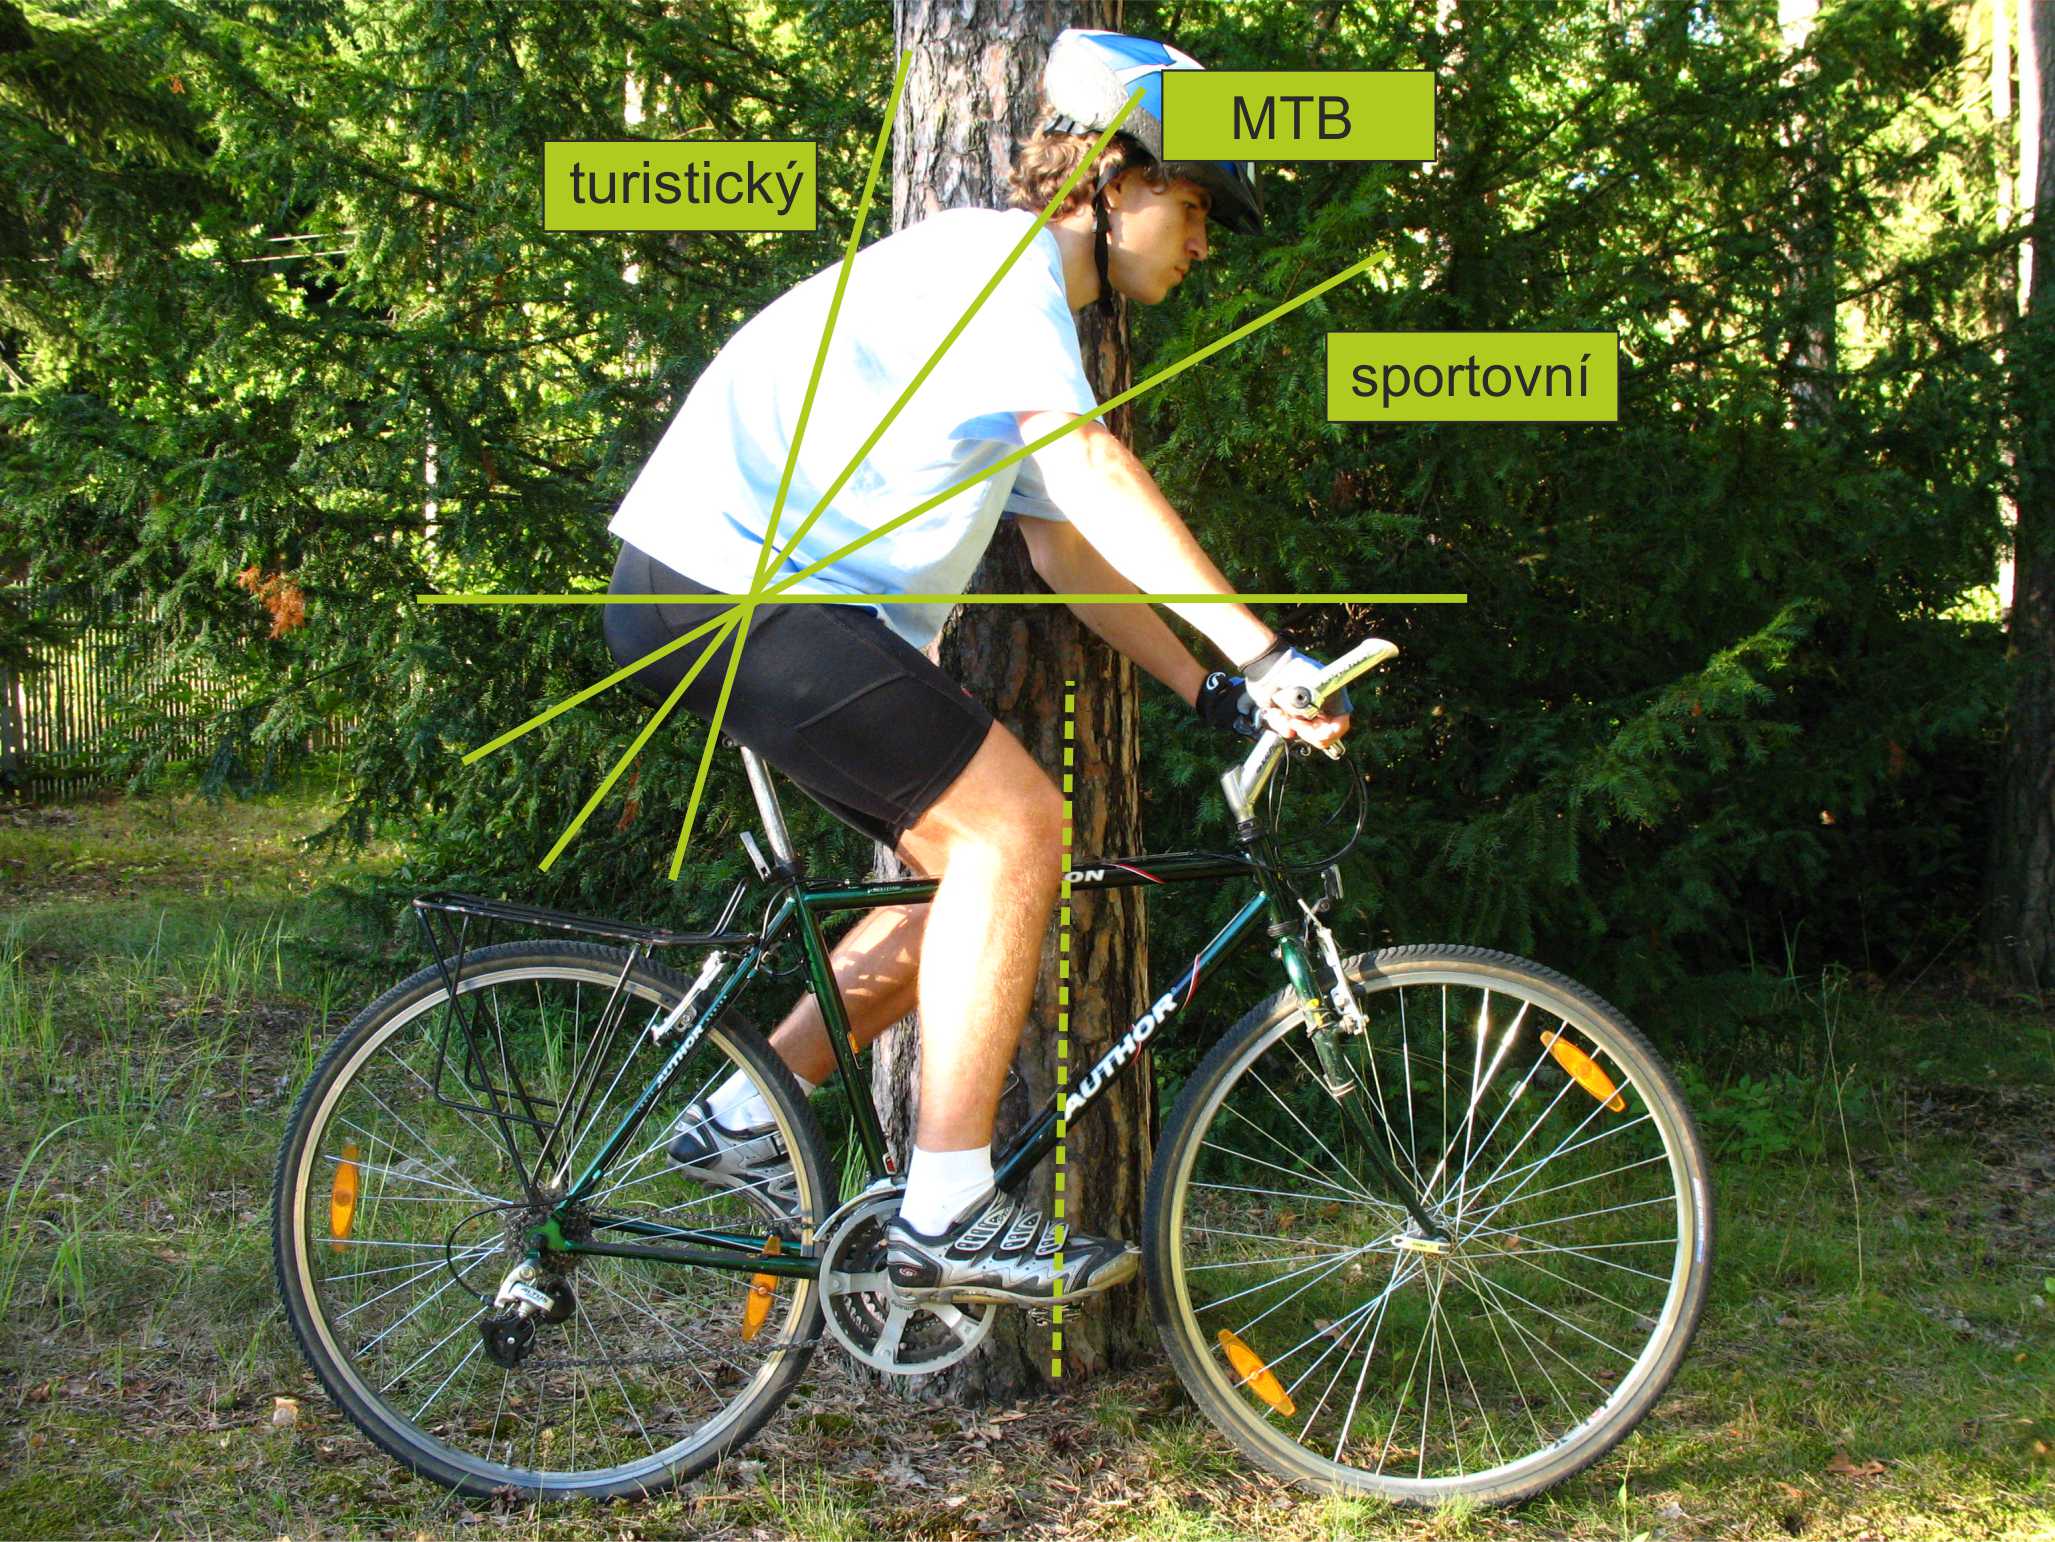
Different types of sits and the right front-back position of the saddle. It is possible to determine it from the knee position above pedals – (in the horizontal position of cycling handles runs the median falling down as a tangent from the front knee, pedal axis).
The sit can be more sport (with a greater lean forward) or a more touristic (with a bigger trunk upright position). The touristic sit is from the biomechanical viewpoint more advantageous for the friendlier spine loading.
Cycling
Ideal is so called round cycling, as cyclists say “ankle play”. It is better to have a special cycling shoes for such cycling, which enable a precise placement of feet on pedals. Cycling is realized by a free feet movement in all joints. The feet heels move all the time more or less above the toe level. The foot works on the whole perimeter of cycling, so the strength is not centred only to front press down, but also to the back pull. We can realize it best when we cycle on a light gear on a flat road with one leg only.
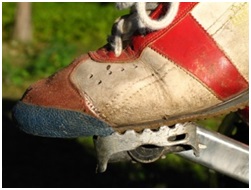
The right position of a foot on the pedal is important for right cycling. When using the cycling shoes the position is determined by the clipping mechanism on the pedal. Feet are placed on pedals in a way that their toe parts are above the pedal axis and the heel is not turned to the side. Small deviations can be natural in respect to the anatomical structure of lower limbs.
Braking
For the right using of brakes it is necessary to realize their function and situation in which brakes are used. The sharp braking in a high speed and especially on a slippery or sandy ground can lead to a skid. It is right to brake always with both brakes together, except for braking in higher speeds in a sharp turn, when you should brake only with the back brake. You should always anticipate and brake in time. You should hold the handlebars all the time in a lock between a thumb and other fingers. The rest fingers brake.
Gears
All today sport bikes have more gears, which enable an economic performance in relation to terrain, wind direction and fatigue. On the flat ground you should use for a sport ride such a gear, so the frequency of cycling moved between 80 and 90 turns a minute. When cycling uphill you should cycle at least 60 turns a minute. We recommend the frequency of cycling at least 60 turns a minute for a recreational cyclist. When the pinions are bigger than gears, we talk about the light gear – the small rate. If there is a bigger difference in favour of gears, we talk about the hard gear – the big rate.
When changing the gear do not watch the gear system, look forward all the time and do not stop cycling. The best is to manipulate gear handles in memory and feel which gear to ride. Do not change gear when cycling strongly up the hill.
The small gear rate stands for light gears, the big rate for hard gears.
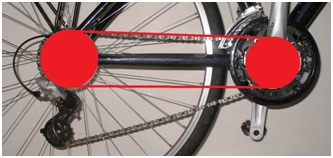
The light gear – the cyclist rides a small distance when turning handles once. When the rate of teeth on the gear and pinion is 1:1, it is the distance equalling the back wheel perimeter.
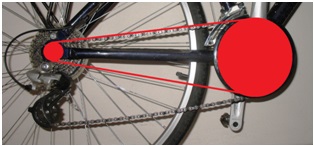
The hard gear – the cyclist rides a big distance when turning handles once. When the rate of teeth on the gear and pinion is 4:1, the distance equals 4 times of the back wheel perimeter.


Cycling on a flat ground
Riding on a flat ground should be fluent, with optimal frequency of cycling. Sit freely so breathing was not limited but hold handlebars tight. Do not move with trunk, shoulders and head if not necessary. Lower limbs and trunk do not influence when cycling in saddle. Practice it without a big demand with the right round cycling. The released sit can be also kept by the often changing of the handlebars grip.
Cycling downhill and turning
In optimal conditions you can cycle even 90 km/h. That requires an excellent technical state of the bicycle and fulfilling other safety conditions (mainly having a helmet and glasses). If you do not trust the bicycle or yourself, brake in time. It is very dangerous to watch the speed computer in high speeds. Make a lower aerodynamic sit, hold handlebars tight. When braking the thumb and fingers should create a lock around handlebars. In terrain move the body back. Do not cycle downhill with chain on the biggest pinion because gears could get into wires. Change the gear in time.
Principles for turning
Brake before the turn.
In sharp turns have the inner pedal up and the outer leg is leaning against the pedal which is down. Start cycling after riding through the turn (on the road).
Be careful not do get on the road verge, which is not firm. If it happens, do not move with handlebars fast to get back to the road, you have to do that slowly.
In terrain a different technique is used. The turn is overpassed and then you make a short change of direction and carry on in the new direction.
Cycling uphill
We cycle a slight uphill with a similar technique as when riding on a flat ground. We only choose a lighter gear. In a steeper hill your body moves more to the back. Therefore, when riding up a steep hill, move your body off the saddle, your body weight is used for a stronger pushing the pedal and intensive pulling the other pedal up at the same time. The efficiency of the pressure on the pedal is increased by pulling the handlebars by hands up on the opposite side. It is necessary to manage this technique especially in terrain. It enables to ride up a short steep hill without getting off the bicycle and without losing the riding rhythm. The longer steep hills in terrain ride up in the saddle by using a light gear. According to the terrain slope and tyres grip you have to move your body in a way you did not fall back and the back wheel would not slip you at the same time.
Overcoming obstacles
Each cyclist should be able to overcome small obstacles. Often there are holes and humps on the road, railways, edge stones in towns, branches in woods and smaller tree stems across the road. Try to overcome the obstacle in a slow ride. Stand up in pedals and cycle to the obstacle upright and to its centre. If the obstacle is higher, slow down before the obstacle move by a sharp jerk with handlebars and at the same time move your shoulders back and get the front wheel on the obstacle or over it. Then move your body weigh forward and relieve the back wheel. If the obstacle is a hole, move your body slightly back and relieve the front wheel. When the front wheel gets off the hole, move the body forward so the back wheel could leave the obstacle easily.
The more demanding and sometimes necessary is overcoming the obstacle by a jump. In a high speed lower your body close before the obstacle (bend your legs sharply) and by a sharp stretching above the pedals and jerking with handlebars up and move almost the whole wheel above the obstacle. Training is good to start over the drawn obstacle on the road. When landing the front wheel has to be in the direction of riding.
Technique and tactics of cycling in a group
Check the technical state of all bikes in a group before starting a trip (see below). Check helmets if they are rightly put on. In the Czech Republic the helmet is obligatory up to 18 years when riding on roads. Cycling gloves and glasses are recommended.
Before the trip check whether technical skills of bikers are sufficient for a safe ride by skill exercises. A biker should be able to start riding in the forward direction, change the ride direction, ride with one hand, stand up in pedals, stop on a required place and get off the bike safely.
Riding technics in a group of children, youth and adults should be adjusted to their needs and skills. When riding on a road the group has to have a theoretical (knowledge of the traffic code) and practical (using signals) preparation. We have to emphasise the personal participation of every member on the safe ride of the group. With a group of small children, try to make the riding amusing and do breaks often. The group organisation and its keeping together is the basis of successful and safe riding. At first the group leader has to be prepared before the trip, organizes the group before riding, controls material, and informs the group about the trip goal.
The leader rides always in front of the group, keeps the optimal speed and the fluent ride with the respect to the weakest members. When riding uphill the leader should not ride too fast for the weaker members and when riding downhill he/she should keep appropriate distances.
The most efficient order is: the leader – weaker group members – other members – the better riders (a rider with the first aid kit and a rider with the mechanical repair kit).
Mechanical repair kit:
Pump, a spare tube, assembly handles for tyres, spare inflation valves, a glue and patches for repairing tubes (add a piece of rubber for repairing a hole in the tyre), a centring key for nipples you have on the bike, a universal key set with spanners, screw drivers (made from a good material), a tape (you can also use the medicine one), little connecting material (screws, nuts, a wire), a pocket knife, a riveting device.
First aid kit:
A stretch bandage, a tape, a sterile bandage of 10 cm width, pressure bandage, plasters, disinfection, a three-end cloth, scissors, 2 safety pins, pain killers, aspirin, antihistamicum (allergy), pills against intestine problems, alufolie, latex gloves, resuscitation mask.
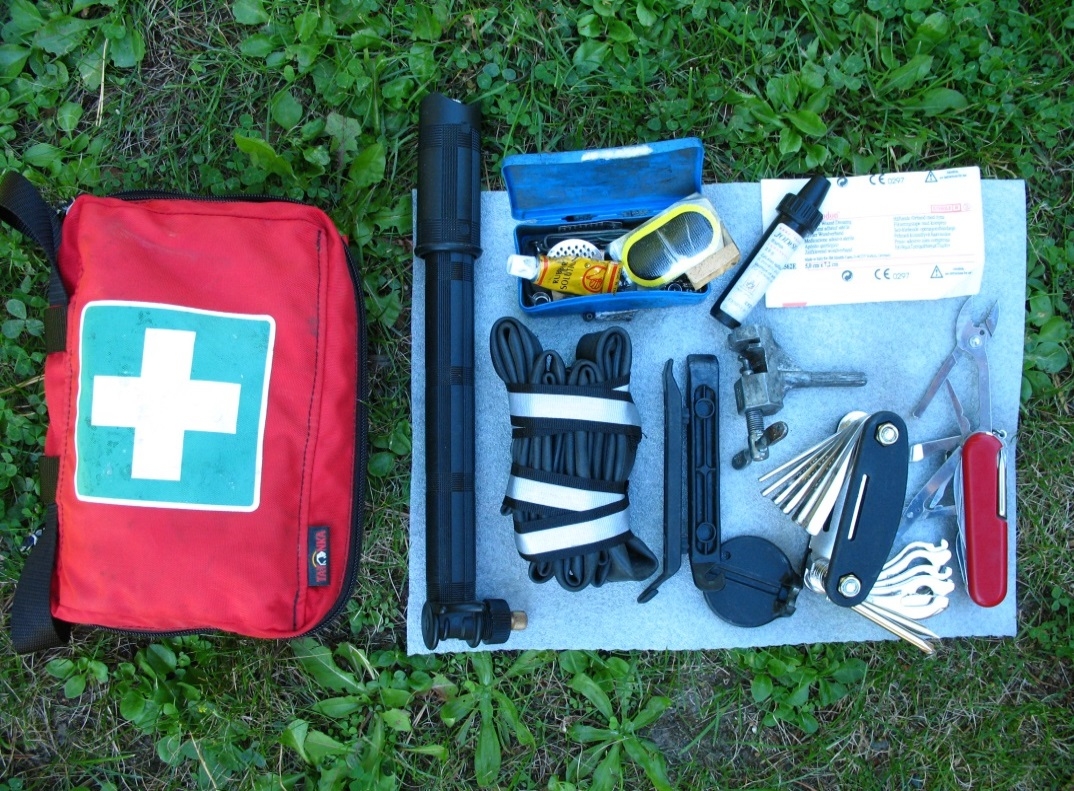
First aid kit and mechanical kit
The leader uses an every suitable and important moment and check the group by a view backwards. If he/she mentions that the group breaks, he/she lowers the speed. It is advantageous if the last group member has a significantly different clothes from the other members. A T-shirt of bright colours has also the safety meaning for vehicles going behind the group.
During school events a group has to have 10 members maximum. There should be at least 100 metres distance between the groups. If children are younger than 10 years or less experienced, it advisable to have two adult leaders in each group. The order and distances should be kept same during the ride: on a flat ground 2-3 m, in steep downhills and on a bad road bigger distances, according to conditions up to 15 m. Riding in hang (less than 1 m) is practiced only with experienced cyclists.
When stopping the leader has to count with the length of the group and stop on such a place that the whole group stood off the road or on the road edge one behind each other. Before starting check everyone is ready to start and start with a slower speed, so members did not lose the contact with the group. Recreation cyclists should make every hour a 5-10 minutes break and after 2-3 hours a 30-60 minutes break.
Basic differences between the recreation and sport performance ride are in tactics of riding downhill, distances between riders, the ride against the wind and changing at the group front. The experienced riders use small distances to save strengths. They change often and react to changes of wind direction by adjusting group positions so they were hidden behind the wind. The rider leaving the group front has to look to the side where he/she will move. On the road check there is not a car overtaking the group. Do not change in turns and close to them, in steep downhills and on a broken road.
Trip, route and itinerary
The trip preparation is also important next to the tactics and techniques of group leading. The route choice depends on group member experiences and their equipment.
Route
It is helpful to write the route into the itinerary shape, which can help us together with the map for easy orientation, solving problem situations and gaining information about interesting objects. When the real time does not correspond to the itinerary time, it tells us to adjust the route, so we got to the goal in time. The good itinerary has variations for shortening the trip, because it can happen the weather changes, you have to repair often or some member hurts.
It is advisable to draw the trip profile especially in hilly terrain so we could count with the higher demands. Count approximately 3, 5 km for every altitude 100 m more in comparison to the flat ground. When cycling in the altitude above 2000 m or in difficult climatic conditions it can be even more. If you prepare a trip in an unknown terrain, especially orientation has to be prepared carefully. The best is if the leader has a map with the marked route or an itinerary straight in front of him in the map holder on handlebars and leads the group without unnecessary breaks and losing the route. Today it is common to let the map laminate or buy such a map. Such a map has a longer life and you can draw your route in it and later wipe it down.
Signals
Signals ensures a safe ride of individuals and cycling groups. Members of the group agree before the trip what individual signals mean. Even an individual cyclist must give signals on roads if he/she wants to change direction or other things he/she wants to do. He/she should signal it in time before starting doing it. During own realization he/she does not have to signal any more. That same is valid for the group and especially for its last member.The rules of signalling in a group of cycle-tourists or recreational cyclists are based on signals realized in competition cycling. All aims and warnings gives the group leader (the front cyclist) to other members beforehand. The other members must repeat the signal up to the last member. Never brake in a group if the other members do not know about it.
Pravidla signalizace ve skupině cykloturistů nebo rekreačních cyklistů vycházejí rámcově ze signalizace v cyklistickém závodním pelotonu. Veškeré záměry a upozornění dává vedoucí družstva (na čele jedoucí cyklista) ostatním členům za ním vědět s časovým předstihem. Ti musí stihnout předat signál včas až k jeho poslednímu členu. V žádném případě se ve skupině nesmí brzdit, aniž by o tom následující jezdci věděli.
Every individual unit has to work so the whole system worked. If anyone ignores the signals, endangers the safety of the following members. If you miss to repeat the signal or have to hold handlebars tight, give the signal by shouting. Shout the information about a danger coming from back to the front.
| Cycling downhill in terrain with moving the centre of gravity backwards |
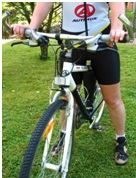 |
| The upper frame pipe should not reach to the crotch |
 |
| The three points determine parameters of the sit – saddle, handlebars, pedals |
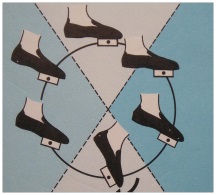 |
| The round cycling is biomechanically the most advantageous way of cycling |
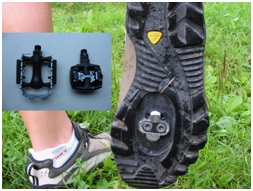 |
| Pedals and clipping mechanism |
 |
| The right position of the foot on the pedal |
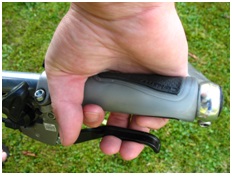 |
| One of possibilities of holding handlebars and braking. The thumb together with some fingers have to create the lock around handlebars |
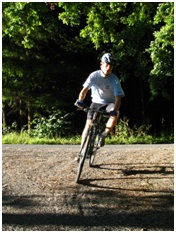 |
| Cycling through a turn on road with a lean inside the turn |
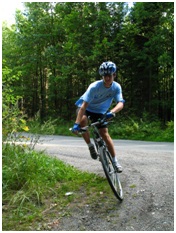 |
| Cycling through a turn with overpassing it and leaning inside the turn |
| Riding up the steep hill in terrain with the adequate position of cyclist´s centre of gravity |
| Riding off the saddle with using the cyclist´s body weight |
| The slow crossing the obstacle with the graduate relieving the wheels |
| Jumping over the obstacle with the fast relieving a wheel |
| The control of the rightly fixed cycling helmet on head |
| An example of a skill ride as a control of the individual technique level |
| Příklad jízdy zručnosti, jako kontroly úrovně techniky jízdy jednotlivce |
| Pomalý přejezd překážky s postupným nadlehčováním kol |
| Organizace skupiny před vyjížďkou |
| Jízda skupiny po rovině podle pravidel silničního provozu při pravém okraji a pouze po jednom za sebou |
| Odjezd skupiny po zastavení |
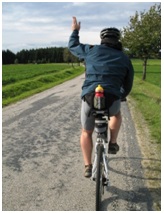 |
| Zdvihnutou paží se vztyčeným prstem signalizujeme nutnou zvýšenou pozornost, protože následuje bezprostřední doplnění, většinou slovní, např. “Zastavíme”. V cyklistickém pelotonu závodníků to znamená, že jezdec, který zdvihne ruku zpomaluje, protože má defekt nebo čeká na pomoc doprovodného vozu. |
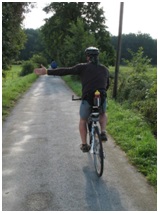 |
| Upažením s dlaní otevřenou vpřed a palcem vztyčeným vzhůru signalizujeme odbočení nebo změnu směru jízdy na stranu upažené ruky. Tento signál musí ukazovat i poslední člen skupiny. Cyklisté jej musí ukázat před započetím úkonu, ale během něj mohou již řídit oběma rukama. |
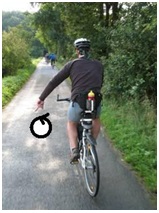 |
| Jestliže kroužíme dlaní na poníž upažené paži, signalizujeme na té straně přítomnost menší překážky nebo nerovnosti (kámen, větev, díra, hrbol). Pokud je cesta rozbitá nebo cyklisté jedou velmi rychle, je dobré použít zvukovou signalizaci, nebo tu, kterou používají závodníci. Ti totiž při stálém držení řídítek palci za brzdové páky nebo nástavce řídítek, mávají zbylými prsty vně řídítek na straně překážky. |
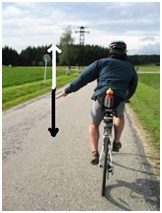 |
| Střídavé upažování povýš a poníž s dlaní směřující k zemi signalizujeme zpomalení. |
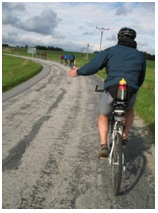 |
| Pohybem paže v upažení s dlaní otočenou dopředu střídavě vpřed a vzad signalizujeme, aby skupina zrychlila. |
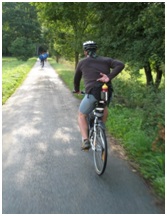 |
| Opakovaným pohybem paže za vlastní záda signalizujeme objíždění předmětu, který stojí v cestě (auto apod.) na straně paže, se kterou pohybujeme |
| Signalizace při přejezdu hlavní silnice, kdy má každý člen povinnost znovu se přesvědčit jestli je přejezd volný |
| Signalizace překážky na cestě v provedení celé skupiny |
