Abseiling
Abseiling started to be used to descend a demanding terrain, when climbing down started to be dangerous. Abseiling techniques are used today in rescue techniques and work in heights. In outdoor education programmes it can be an individual activity.
Abseiling is a safe activity if you keep to the basic rules. However, a little mistake can be fatal. In the past climbers abseiled by the technique called Dülfer seat (the rope is turned around a body) and it is occasionally used even today. We will describe only abseiling with mechanical aids. We use the abseiling device (figure eight, belaying device, etc.), carabiner with a lock, a climbing harness, a static or dynamic rope, and other aids for a self-belay.
The first presumption to abseil safely is the choice of the place and the self-belay. On training rocks and artificial walls there are top anchors with abseiling chains or loops. The rope can be pulled through the top anchor or when abseiling repeatedly we can clip it in two fixed points. Fixed points must not be connected with the rope together, but the rope loop has to be fixed to each point on its own. In nature we can use trees and rock spikes. If you use a tree for abseiling, do that always with using a sling. The friction between a rope and a tree can release pitch, which destroys the rope and can lead to the tree death. It is necessary to check the state of the abseiling point before own abseiling. Do not trust bushes and loosen rocks. Be careful when abseiling on a rope pulled through the sling, repeated rope pulling down can burn the sling.
On the belay stance, you should save yourself with a sling, which is clipped in a fixed belay. The carabiner should not touch the rock or wall with the lock.The sling has to be loaded all the time during the abseiling preparation.
Another step is pulling the rope through the abseiling loop or the sling, so both rope ends reached the ground. Many accidents happened because both rope ends were not on the ground and one rope end “hung” in the air. When pulling the rope through the loop, control the state of the rope, whether it is not cut or damaged. Do not lower the rope down, but throw it, if possible each half coiled separately. You avoid getting the rope stuck in cracks.
Then you put the rope into an abseiling device which is clipped through the locking carabiner to the central loop on the harness. Now it is necessary to control everything. Check especially the right pulling the rope through the abseiling device, clipping the device to the harness, locking the carabiner, whether both rope ends are on the ground and ropes are not knotted. Then you can unclip your self-belay sling
Abseiling starts crossing the rock edge, which is the most difficult. The rope is led on the other side of the thigh. We hold it with one hand under the abseiling device, the other hand balances the body above the abseiling device. The trunk is upright, legs are slightly straddled. If we sit fully in the harness we can put the upper hand to the lower one under the abseiling device.
Belaying has to be provided in beginners and during multi-pitch abseiling. They can use the self-belay with a tightening knot, which is placed under the abseiling device, or belaying with a partner, who in case pulls the lower ropes ends. The optimal tightening knot for abseiling is the Machard knot or Plait.
During repeated abseiling over the edge it is suitable to protect the rope before cutting, e.g. by putting a piece of carpet or a rounded log between the rope and the edge).
Abseiling without a self-belay
Preparation of a self-belay when abseiling
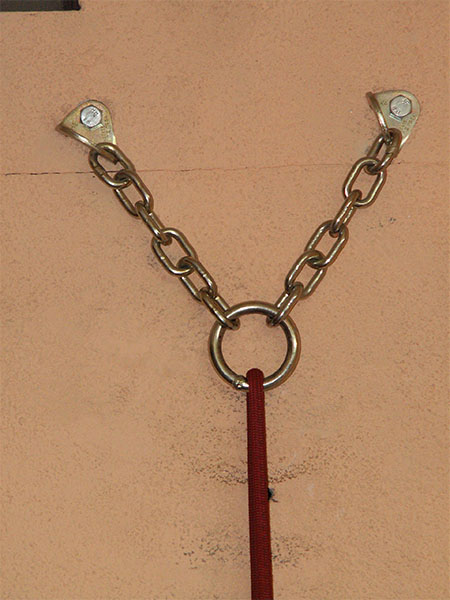 | 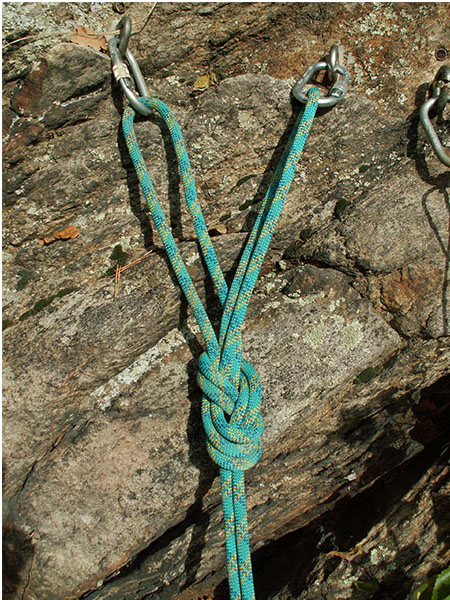 |
| Pulling the rope through the top anchor or clipping it in two fixed points | |
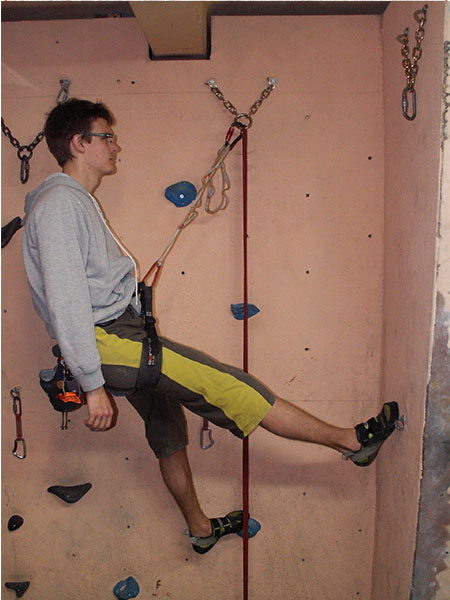 | |
| When abseiling watch your own safety, control your steps all the time | |
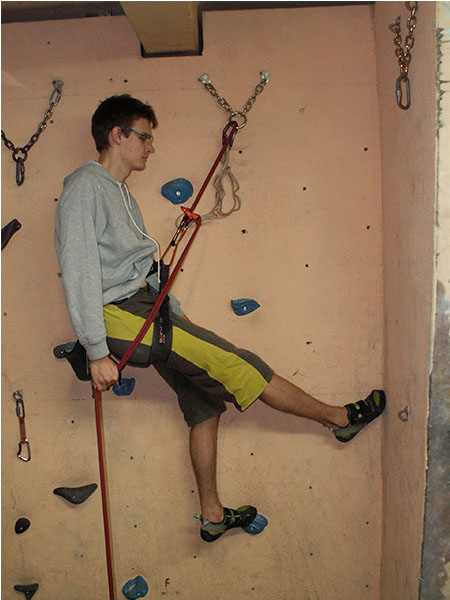 | |
| You have to load fully the abseiling device before clipping off the self-belaying | |
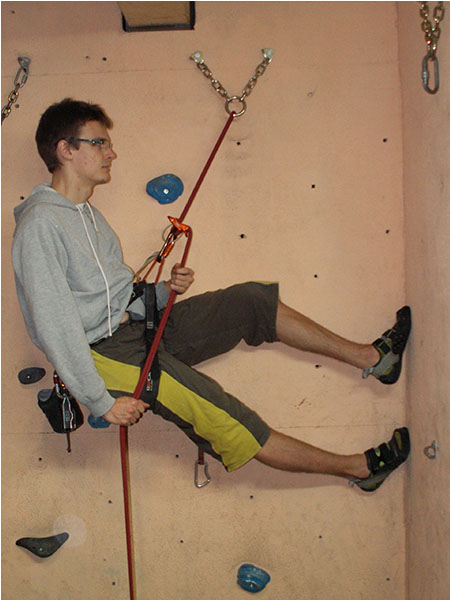 | |
| You have to hold both hands under the abseiling device at the level of thighs | |
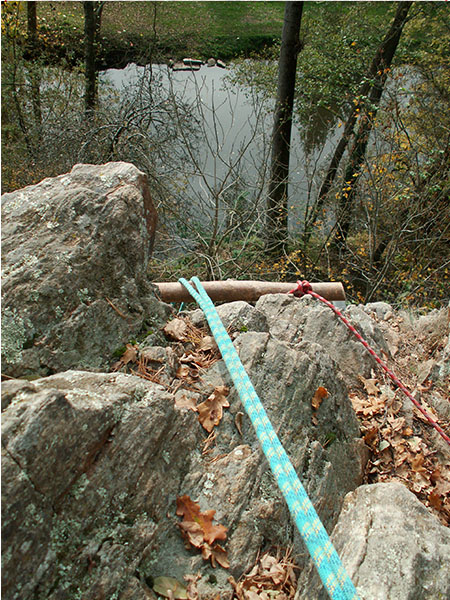 | |
| Sharp edges are necessary to be covered by a carpet or a rounded log | |
